


3 cups flour
1 t soda
½ t salt
½ c butter
½ c shortening
1 c sugar
½ c brown sugar firmly packed
2 eggs
2 T water
1 t vanilla
3 pkg (9 oz each) chocolate kisses or mints)
walnut halves, optional
Sift flour, soda and salt - set aside. Cream butter and shortening; Add sugars and cream until light and fluffy. Add eggs, water, and vanilla. Beat well. Blend in dry ingredients thoroughly and chill at least 2 hours. Shape cookies by enclosing a kiss in 1 T dough. Place on greased baking sheet about 2" apart. Top cookies with walnut half. Bake 375°F. 10-12 minutes.
Hint: Put one slice bread in cookie container to keep them softer and fresher.
Saturday, April 16, 2011


Saturday, April 9, 2011
Stir And Drop Sugar Cookies
2 eggs (beaten)
2/3 cups cooking oil
2 t vanilla
¾ c sugar
2 t baking powder
½ t salt
Beat eggs, stir in oil and vanilla. Blend in sugar. Sift together flour, baking powder and salt. Stir into oil mixture. Drop with teaspoon on ungreased baking sheet; flatten with greased glass dipped in sugar. Bake 8-10 minutes at 375-400° until brown. Remove from sheet immediately.
Saturday, April 2, 2011
Chocolate Dreams
1 (6 oz) pkg chocolate chips
1 c peanut butter
2½ c corn flakes
Place chocolate chips and peanut butter in top of double boiler and heat until melted, stirring constantly. Add corn flakes and mix well. Drop from teaspoon onto waxed paper and place in cool area to harden.
1 c peanut butter
2½ c corn flakes
Place chocolate chips and peanut butter in top of double boiler and heat until melted, stirring constantly. Add corn flakes and mix well. Drop from teaspoon onto waxed paper and place in cool area to harden.
Sunday, March 13, 2011
CNewcomb's Woodworking
The smell of fresh cut wood used to fill my nostrils and the various sounds from the machines (saw, lathe, planner, router, etc) would fill my ears with their melodic tune in a happier moment of my childhood. The scent and sound were my first clues that something interesting was going on behind the curtain that was erected to keep the dust out of the laundry area in the shop.
It seemed to be a very magical place as one could never be sure what would be found on the other side of that curtain. Would it be a toy box? spindles for the staircase? a jewelry box? a wall plaque? paper towel holder? bowls? a truck or car? furniture for a doll house? or furniture that would be passed down from generation to generation in the form of a table, hutch, boot bench, or bed frame? a rocking horse? The possibilities were endless and reality was seldom disappointing.
That's what I experience when I visit CNewcomb's Woodworking studio at ArtFire. Instead of peeking behind the curtain, I just click on my favorites for a quick look at what's on display. My mind asks the question of "What will be there for me to discover today?" and I'm instantly able to experience the same wonder and delight I had as a child, but without the smells and sounds
CNewcomb's Woodworking has many lovely items to choose from. All would make wonderful additions to your home or office. I had a very hard time choosing a sampling to show you from the many sections and items in his studio. This is what I came up with.
Write it in style:


For the home:


Handmade Custom Wooden Name Key Chains

For the lady in your life:
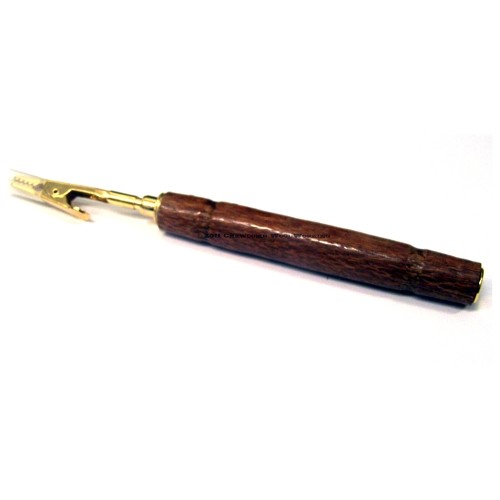
For someone who sews:

Ornaments:


Each of the above items shown and many items not shown would make a lovely addition to your home, office or as an excellent gift for a friend or loved one.
Saturday, March 12, 2011
No Cook Mint Patties
1/3 cup light corn syrup
¼ cup butter
1 t peppermint extract
4 cups sifted powdered sugar
2 drops red food coloring
2 drops green food coloring
In a small mixer bowl combine the corn syrup, butter, and peppermint extract; beat till well combined. Gradually add 2 cups of the powdered sugar, beating well. Stir in as much of the remaining powdered sugar as you can with a spoon. Turn out onto a surface lightly coated with a little powdered sugar. Knead in enough of the remaining powdered sugar to make a stiff dough that is smooth.
Divide dough into thirds. Using one third of the dough, knead in the red food coloring till evenly distributed. Knead the green food coloring into another third of the dough. Leave the remaining third white. Shape the dough into ¾" balls; place 2 inches apart on baking sheets lined with waxed paper. Press with tines of a fork. If necessary, dip the fork in powdered sugar to prevent sticking. Let dry several hours. Makes about 75 mints.
Wednesday, March 2, 2011
Crispy Chocolate Peanut Butter Bars
½ cup light corn syrup
¼ cup packed brown sugar
1 cup peanut butter
2 cups crisp rice cereal
1 cup cornflakes, slightly crushed
1 6 oz package semisweet chocolate pieces
1 t vanilla
In a 2 quart saucepan combine corny syrup, brown sugar, and dash salt. Cook and stir till mixture comes to a full boil. Stir in peanut butter. Remove from heat. Stir in cereals, chocolate pieces, and vanilla. Press into an ungreased 9x9x2" pan. Chill 1hour. Cut into bars. Makes 36
¼ cup packed brown sugar
1 cup peanut butter
2 cups crisp rice cereal
1 cup cornflakes, slightly crushed
1 6 oz package semisweet chocolate pieces
1 t vanilla
In a 2 quart saucepan combine corny syrup, brown sugar, and dash salt. Cook and stir till mixture comes to a full boil. Stir in peanut butter. Remove from heat. Stir in cereals, chocolate pieces, and vanilla. Press into an ungreased 9x9x2" pan. Chill 1hour. Cut into bars. Makes 36
Sunday, February 27, 2011
Sticky Nut Rolls
½ cup light corn syrup
1/3 cup packed brown sugar
3 T butter
1 T water
1/3 cup coarsely chopped pecans or walnuts
2 cups all purpose flour
1 T baking powder
½ t salt
1/3 cup shortening
¾ cup milk
¼ cup granulated sugar
½ t ground cinnamon
In a saucepan combine syrup, brown sugar, butter, and water. Cook and stir over low heat till brown sugar dissolved; Do NOT Boil. Spread in bottom of a 9x9x2" baking pan. Sprinkle nuts over.
In a mixing bowl stir together flour, baking powder, and salt. Cut in shortening till mixture resembles coarse crumbs. Make a well in Center. Add milk all at once, stirring just till dough clings together. Turn dough out onto a lightly floured surface. knead dough gently 15 to 20 strokes. Roll into a 12x10" rectangle. Combine granulated sugar and cinnamon; sprinkle over dough. Roll up jelly roll style, beginning with long side. Slice into 1" pieces. Place, cut side down, in prepared pan. Bake in a 425° oven 30 minutes or till golden. Loosen sides and invert onto a serving plate. serve warm Makes 12 rolls
1/3 cup packed brown sugar
3 T butter
1 T water
1/3 cup coarsely chopped pecans or walnuts
2 cups all purpose flour
1 T baking powder
½ t salt
1/3 cup shortening
¾ cup milk
¼ cup granulated sugar
½ t ground cinnamon
In a saucepan combine syrup, brown sugar, butter, and water. Cook and stir over low heat till brown sugar dissolved; Do NOT Boil. Spread in bottom of a 9x9x2" baking pan. Sprinkle nuts over.
In a mixing bowl stir together flour, baking powder, and salt. Cut in shortening till mixture resembles coarse crumbs. Make a well in Center. Add milk all at once, stirring just till dough clings together. Turn dough out onto a lightly floured surface. knead dough gently 15 to 20 strokes. Roll into a 12x10" rectangle. Combine granulated sugar and cinnamon; sprinkle over dough. Roll up jelly roll style, beginning with long side. Slice into 1" pieces. Place, cut side down, in prepared pan. Bake in a 425° oven 30 minutes or till golden. Loosen sides and invert onto a serving plate. serve warm Makes 12 rolls
Sunday, February 13, 2011
Peanut Custard Pie
Pastry for a Single Crust Pie
3 eggs
1 cup dark corn syrup
2/3 cup sugar
1/3 cup butter, melted
1 t vanilla
Dash salt
1 cup peanuts
Unsweetened whipped cream
Prepare and roll out pastry. Line a 9" pie plate. Trim pastry to ½" beyond edge of pie plate. Flute edge; do not prick pastry. Bake in 450° oven for 5 minutes. Cool thoroughly on rack.
For filling, in mixing bowl beat eggs slightly with rotary beater. Stir in corn syrup, sugar, butter, vanilla and salt; beat with rotary beater till smooth. Stir in peanuts. Place pie shell on oven rack; pour mixture into the partially baked pastry shell. To prevent over browning, cover edge of pie with foil. Bake in 350° oven for 25 minutes more or till knife inserted off center comes out clean. Cool pie on rack before serving. Garnish pie with whipped cream. Cover, chill to store.
3 eggs
1 cup dark corn syrup
2/3 cup sugar
1/3 cup butter, melted
1 t vanilla
Dash salt
1 cup peanuts
Unsweetened whipped cream
Prepare and roll out pastry. Line a 9" pie plate. Trim pastry to ½" beyond edge of pie plate. Flute edge; do not prick pastry. Bake in 450° oven for 5 minutes. Cool thoroughly on rack.
For filling, in mixing bowl beat eggs slightly with rotary beater. Stir in corn syrup, sugar, butter, vanilla and salt; beat with rotary beater till smooth. Stir in peanuts. Place pie shell on oven rack; pour mixture into the partially baked pastry shell. To prevent over browning, cover edge of pie with foil. Bake in 350° oven for 25 minutes more or till knife inserted off center comes out clean. Cool pie on rack before serving. Garnish pie with whipped cream. Cover, chill to store.
Monday, January 17, 2011
I Tried Something New...
For awhile I have been admiring the work of several artisans, many I've gotten to know via ArtFire, PLURK, and Facebook. I often listened as they discussed their medium. I was even brave enough to ask a few questions and all the while I took notes.
Most of the artisans that I have admired, followed, and spoken with are members of a highly gifted and talented members of a guild on ArtFire known as Polymer Clay Smooshers. Sometimes this bunch of inspirational and creative artisans are referred to as smooshers.
Once a month from January to September these smooshers are set a challenge. The challenge is for each individual who wants to participate to make an item or items out of polymer clay and other bits (if needed) that shows their interpretation of a given theme. At the end of the month, those who participated have their creations unveiled for the world to see on the Polymer Clay Smooshers blog.
The last challenge that the Smooshers were given was mythology. There were numerous creations and a nice variety to the myths. You can see who participated and just what was created here.
After a long time of following this wonderful group, I started to think it might be possible for me to give this medium a try. Although several of my notes went MIA and I have nightmares of my time in art class, I eventually worked up the nerve to ask Santa for some clay and some tools. I figured no pressure that way. Well the big guy listened and delivered several useful items for me to do something with. But, to do what? I wasn't sure. I was advised that inspiration could be found if I was patient and open to whatever might be whispered in my ear or seen out of the corner of my eye. I waited. I looked through books and magazines. I reviewed the Artfire shops of several of the Smooshers and I followed closely the talk, sneak peeks, trouble shooting, brain storming ideas that various smooshers included me in and nothing happened. Then as the ending of their challenge drew nearer to a close and I was about to start listing everything in a destash shop and idea came to me.
I had been talking to someone earlier in the day who had known many of my family members. This led to me thinking about the various stories that one particular family member told me to pass the time when I was so sick. Suddenly it clicked. I could do something small that wouldn't be too hard for me to create. It even fit in to the theme of the smoosher's challenge. I could create something in the Mythology category based on a story that my Great Aunt had told me and I could show it to my Smoosher friends. If I had a problem or concern, I could talk to them without being too much of a distraction as everyone was working on something in Mythology.
For the record: I am not a Smoosher. I just hang out with several of them on PLURK and Facebook. They motivated me to try this project and their theme plus reminiscing about a loved one gave me the inspiration to do this piece.
Step One was to Google everything I could about my myth.
Step Two was to gather together my supplies and notes.
Step Three was to condition the polymer clay colors. This was a very therapeutic and enlightening step.
Step Four was smooshing the clay into some shape

Step Five was panic and see who was online to answer my questions. Thankfully Into the Dawn and Haffina were available to assist me.
Step Six was to assemble it.
Step Seven was to add the finishing details and touches.
Step Eight was to panic again as I was missing my notes on how to prep it for the oven. Again Into the Dawn and Haffina were able to help me figure out what I needed to do for the piece to come out.
Step Nine was follow the instructions given on the clay and from them. Baking soda, tinfoil, oven thermometer, timer, etc.
Step Ten was to bake it in the oven and monitor the oven. Lesson learned that the oven isn't that accurate. Thankfully I knew the importance of having an oven thermometer and timer for this step. That was one thing that was a constant refrain from all my observing. I'm also very thankful that I was reminded to use them.
Step Eleven Pull it from the oven and let it cool.
Step Twelve take pictures. My pictures are in the rough as I was just too excited to share my piece. Soon as descent lighting conditions happen I promise to take better pictures.


Well there you have it. That's my finished piece and my interpretation of Thor's Hammer. I'm very surprised and pleased with how well it turned out given that I haven't attempted anything before in this medium. It took me about 6 hours from start to pulling it out of the oven to cool. Had I been a smoosher I would have just made the cut off time by a hair using the not so great photos above.
Most of the artisans that I have admired, followed, and spoken with are members of a highly gifted and talented members of a guild on ArtFire known as Polymer Clay Smooshers. Sometimes this bunch of inspirational and creative artisans are referred to as smooshers.
Once a month from January to September these smooshers are set a challenge. The challenge is for each individual who wants to participate to make an item or items out of polymer clay and other bits (if needed) that shows their interpretation of a given theme. At the end of the month, those who participated have their creations unveiled for the world to see on the Polymer Clay Smooshers blog.
The last challenge that the Smooshers were given was mythology. There were numerous creations and a nice variety to the myths. You can see who participated and just what was created here.
After a long time of following this wonderful group, I started to think it might be possible for me to give this medium a try. Although several of my notes went MIA and I have nightmares of my time in art class, I eventually worked up the nerve to ask Santa for some clay and some tools. I figured no pressure that way. Well the big guy listened and delivered several useful items for me to do something with. But, to do what? I wasn't sure. I was advised that inspiration could be found if I was patient and open to whatever might be whispered in my ear or seen out of the corner of my eye. I waited. I looked through books and magazines. I reviewed the Artfire shops of several of the Smooshers and I followed closely the talk, sneak peeks, trouble shooting, brain storming ideas that various smooshers included me in and nothing happened. Then as the ending of their challenge drew nearer to a close and I was about to start listing everything in a destash shop and idea came to me.
I had been talking to someone earlier in the day who had known many of my family members. This led to me thinking about the various stories that one particular family member told me to pass the time when I was so sick. Suddenly it clicked. I could do something small that wouldn't be too hard for me to create. It even fit in to the theme of the smoosher's challenge. I could create something in the Mythology category based on a story that my Great Aunt had told me and I could show it to my Smoosher friends. If I had a problem or concern, I could talk to them without being too much of a distraction as everyone was working on something in Mythology.
For the record: I am not a Smoosher. I just hang out with several of them on PLURK and Facebook. They motivated me to try this project and their theme plus reminiscing about a loved one gave me the inspiration to do this piece.
Step One was to Google everything I could about my myth.
Step Two was to gather together my supplies and notes.
Step Three was to condition the polymer clay colors. This was a very therapeutic and enlightening step.
Step Four was smooshing the clay into some shape

Step Five was panic and see who was online to answer my questions. Thankfully Into the Dawn and Haffina were available to assist me.
Step Six was to assemble it.
Step Seven was to add the finishing details and touches.
Step Eight was to panic again as I was missing my notes on how to prep it for the oven. Again Into the Dawn and Haffina were able to help me figure out what I needed to do for the piece to come out.
Step Nine was follow the instructions given on the clay and from them. Baking soda, tinfoil, oven thermometer, timer, etc.
Step Ten was to bake it in the oven and monitor the oven. Lesson learned that the oven isn't that accurate. Thankfully I knew the importance of having an oven thermometer and timer for this step. That was one thing that was a constant refrain from all my observing. I'm also very thankful that I was reminded to use them.
Step Eleven Pull it from the oven and let it cool.
Step Twelve take pictures. My pictures are in the rough as I was just too excited to share my piece. Soon as descent lighting conditions happen I promise to take better pictures.


The following is a list of a few of the artisans and members of the Polymer Clay Smooshers Guild. (click on their name to be taken directly to their ArtFire studio).
For a complete listing of the Polymer Clay Smooshers Guild Members and their studios, please visit their blog here.
Wednesday, January 12, 2011
Reminder Check Your Life Paperwork
Another year successfully completed. Another batch of Life paperwork processed, sorted, and updated. Not ever heard of such a thing? Unsure what I'm speaking about or where to start? Check out what I said last year.
Ah, we have survived another year. What a blessing it is to be able to enter into another year of life. What will it bring? Will it be filled with joyous occasions or miserable moments? Are you prepared for either?
Ah, we have survived another year. What a blessing it is to be able to enter into another year of life. What will it bring? Will it be filled with joyous occasions or miserable moments? Are you prepared for either?
As
I was waiting for a dear friend to join me for lunch at our favorite
restaurant I couldn't help but to overhear a conversation of the
neighboring table. There were 4 participants at it. Each was observed to
be in a highly emotionally charged state. The looks of shock, grief,
anger, and uncertainty even fear was very apparent.
As
there conversation became more audible it was soon quite clear what the
problem was. A family member had died suddenly and the party had met to
discuss what to do about it. It was heart wrenching to know that some
of their suffering could have been prevented if the deceased's life
paperwork had been done and kept up to date. It brought up memories of
my own experiences with death. I am no expert but I do understand the
importance of clear instructions and legal documentation through life
paperwork vs. muddle instructions, fanciful thinking, and no legal
documentation or life paperwork.
When
my friend showed up she had a large envelope that was rather over
stuffed. Because of the natural curiosity such an unusual item in her
possession brought out and the continued conversation that we were
hearing from our neighboring table. Our topic of conversation turned to
life paperwork.
While
I won't bore you with the nitty gritty details of our discussion; I
will share a few key points from it. See the large envelop was a part of
her life's paperwork. Her current husband has a yearly tradition of
reviewing the life paperwork for them and some immediate family. She was
a little unnerved by it the first year they did but as they have gone
through the process for awhile now. She can really see the benefit of
it. She's very zealous in encouraging others to do the same.
It's
quite simple to do as she explained it to me. Every January they get
out their wills, life insurance, medical information, titles, etc. and
they review them together. This way they make sure that everything is
up to date and current. This way they can also make sure that any
changes that need to be made are gotten done.
An
excellent example she used was about a trust document and finacial
guardianship for one of her children. There is a trust document that
will have to be dealt with in March. Because of the review they did last
week, they are aware that the attorney needs to be contacted and
certain things must be done now in order not to miss its deadline. They
also became aware that they needed to make a change for one of the
children who is now in need of someone to handle their finances should
my friend not be able to do it. Now is clearly the time to find someone
else that could assist the child so the child doesn't run into horrible
financial problems in the future. They need someone they can trust and
who can be brought up to speed on the situation. Again something that
would more than likely been off their radar had it not been for the
yearly review.
Another
example of the yearly review involves my friends elderly mother. Her
mom has been seriously ill and has a very complicated medical history.
There is now a new doctor in the picture so my friend needs to update
the medical contact information to include this new doctor. They also
must find a new POA because of her father's ill health. He's no longer
the best choice as the main POA. Little things they may appear now. But
not so little in the midst of a crisis. Suddenly you could either be
frozen with too many decisions to make, kicking yourself for not doing
something or for having done something you regret or breathing a sigh of
relief.
Some people use tax time as they are already dealing with paperwork then to check their life's paperwork which is what my friend's sister does. Some like my friend picks the beginning of the year which happens to be January for the reoccurring reminder to check this paperwork. Or maybe, it would be better to use a birthday or anniversary or another date that is significant to you.
If you can't bring yourself around to do this, consider what you want for your loved ones. Or consider what you would want someone to have done for you if you were put into x scenario with a, b, c resources? Its far kinder to be prepared even slightly than left adrift in a sea of uncertainity.
So what does your life's paperwork look like? What your Life Paperwork looks like can and should vary greatly from person to person, situation to situation. After all not every situation can be carbon copied or cookie cutter made nor should it be.
Here are somethings to think about including from what my friend and I have done along with the experiences I've had.
Your Life's Paperwork might contain:
Wills
Guardians Here is something that should be reviewed periodically. Does the need still exist? Is the chosen person still willing and able to do it?
Life Insurance
Titles or verification of ownership to vehicles, property, accounts, etc.
Location of important documents such as birth certificates, social security cards, passports, wills, policies, etc.
Important medical information to include in your life paperwork can vary greatly and be highly unique per person. Some are obvious like insurance card and doctors phone # and address. Others might not be quite as obvious like vitamins or alternative practices that you use (Acupressure/Acupuncture, Chiropractic, etc.) Here are few that I have seen or have in my life paperwork.
Medical diagnosis
current medications being taken
current supplements being taken
medications that were discontinued between visits to the doctor
same with supplements
medications that have been questionable or uncertain
ex. I can take a specific allergy medication when my allergies flair up but when I do I become like the Energizer bunny. I tend to be on the move and unable to sit or stay still for periods longer than a minute and I have a very high pulse rate. It's not an allergy but it is something the doctors need to be aware of that happens so they don't think something else is happening if I have taken this particular medication.
Allergies
Situations that could be handled in certain ways.
Don't allow the fear of embarrassment or being seen as silly to stop you from speaking up. I am not sure if I'm claustrophobic or if it's something else, but I intensely dislike being in situations where I am trapped. My first MRI was a horrible experience because of it. By mentioning it to the doctor the second time I had one it was a lot better because he was able to give me something to take the edge off. The staff seemed to give me more of a blow by blow and count down as to what was happening and that made all the difference. One staff worker even mentioned how she wished more people would be so frank. Another said it would be beneficial for family members to know because it can make a difference between someone resisting a test because of intoxication or head injury versus someone resisting because of claustrophobia and panic when they are unable to communicate. (the last was very obvious when a rather mild mannered family member who'd had a stroke became a brawler)
List of special words or phrases that might not be commonly or easily recognized that the patient uses
ex. someone who has speech impairment, stroke, or other reason that makes them hard to understand. Here's one from the immediate family the child has a hard time saying the word police. it comes out something like Koplise with a stong K beginning sound and a lot of hissing s sound at the end. It makes absolutely no sense and is hard to copy. So to those outside the inner circle of family and friends. No one would get that the need for police is what was being requested.
Another example was observed by a family member who had a stroke with dementia. She would say car to indicate her desire to be moved in some way. Turned in bed, pushed closer to a table when in a wheelchair. Once it was figured out there was far less frustration for her, her caretakers and visitors.
List of medical procedure with dates and locations.
List of items put in.
ex. Another family member has had a hernia surgery that required a piece of mesh to be put in to reinforce the body. Now that may not seem like a huge issue but with the advancement and popularity of using a scope to do surgery these days it's an issue. Especially if they want to go near the bellybutton.
Medical testing. List the type, date, location here to.
Next of kin in case of emergency.
Alternate in case of emergency contact. This is in case the 1st person can't be reached immediately.
Advanced Medical Directive form sometimes called 5 Wishes.
Medical POA who has it? where is it located? Does the person listed still able to be in charge? This is very important to review periodically.
Having witnessed or
experienced first hand a situation where simply having a will, being
aware of a doctors name, having an up to date POA, etc could have made
a world of difference. I see the value in what my friend is doing.
Suddenly that large envelope seemed as an extremely important, valuable treasure chest and our lunch
date less.
So please take a moment
and make sure that your life's paperwork is in order. I know it can be
a challenge to remember to do this. After all who wants to entertain
morbid thoughts of death, dying, illness? But trust me it's far better
to take a moment now to do so than to not have done it and deal with a
nightmare it can become.
Subscribe to:
Posts (Atom)


